Originally published on Medium.
Matter is an open-source, IP-based connectivity standard designed to unify smart home devices across ecosystems — Apple Home, Google Home, Amazon Alexa, and others. This guide walks you through setting up a full Matter development environment on Windows, building the official lighting-app example from the ESP-Matter SDK, and flashing it onto an ESP32.
By the end of this tutorial, your ESP32 will appear as a native Matter device, ready to be commissioned into any Matter-compatible hub.
Prerequisites
Before you begin, ensure you have the following:
ESP32 Development Board — An Espressif ESP32-S3-DevKitC-1 or equivalent ESP32 board
Windows PC — Windows 10 or later
Matter Hub — Any Matter-compatible hub, such as the Amazon Echo (4th Gen) or Apple HomePod mini
Basic familiarity with IoT concepts and the ESP32 ecosystem
Git installed and available in your PATH
Environment Setup
The official Espressif Windows Installer handles the entire toolchain — including GCC, CMake, Python, and Ninja — so you do not need to run manual package manager commands.
1.1 Install the ESP-IDF Toolchain
- Navigate to the ESP-IDF Tools Installer page and download the latest Windows installer.
- Run the installer. When prompted, ensure that Git and Python are selected as components.
- At the end of installation, launch the ESP-IDF PowerShell Environment (or Command Prompt). All subsequent commands must be run inside this environment, as it pre-configures all necessary paths and variables.
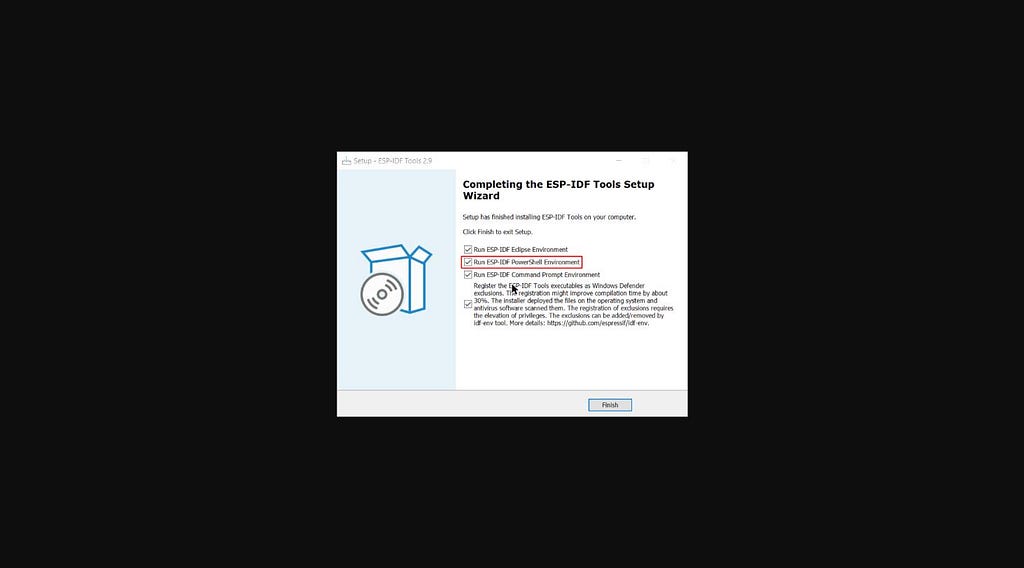 The ESP-IDF Tools Setup Wizard completion screen — ensure “Run ESP-IDF PowerShell Environment” is checked before clicking Finish.
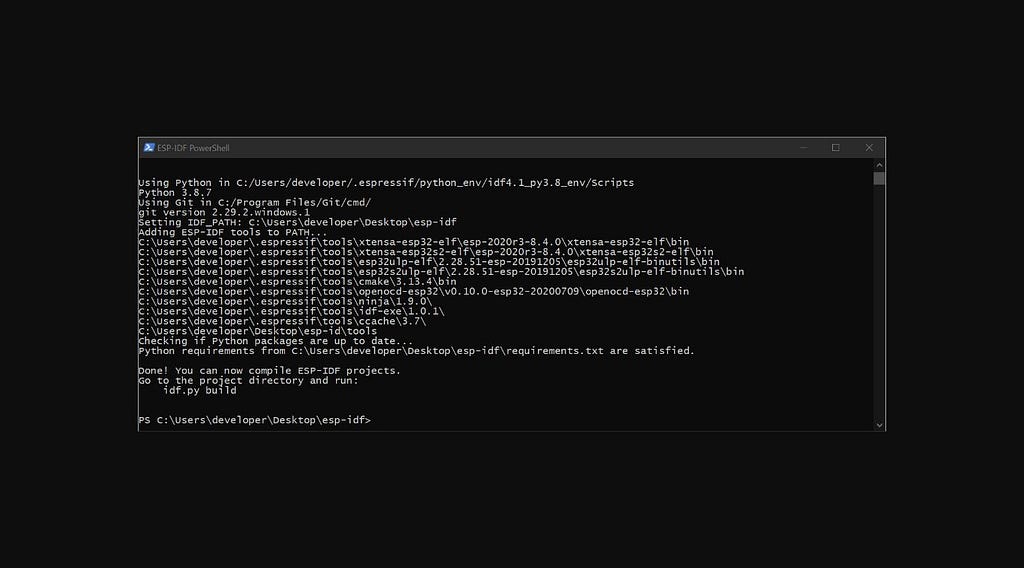 The ESP-IDF PowerShell Environment launches automatically after installation, with all toolchain paths pre-configured.
- 2 Set Up the Matter SDK (ConnectedHomeIP)
- Open the ESP-IDF PowerShell Environment you just launched and run the following commands.
- Create a working directory:
- mkdir C:\esp-dev
- cd C:\esp-dev
- Clone ESP-IDF (skip if the installer already placed it in C:\esp-dev\esp-idf):
- git clone -b v4.4.3 — recursive https://github.com/espressif/esp-idf.git
- Clone the Matter SDK:
- git clone https://github.com/project-chip/connectedhomeip.git
- cd connectedhomeip
- git fetch origin v1.0-branch
- git checkout FETCH_HEAD
- Fetch submodules (ensure Python and pip are installed):
- python scripts/checkout_submodules.py — shallow — platform esp32
1.3 Add Windows Bootstrap Scripts
The Matter SDK’s default bootstrap scripts target Linux. The two PowerShell scripts below replace them for Windows.
Save the following as bootstrap.ps1 inside the scripts\ directory. This script initializes git submodules, sets required environment variables, and runs the Pigweed Python environment setup.
1.4 Identify the Serial Port
Connect your ESP32 board via USB.
Open Device Manager (search for it in the Start menu).
Expand Ports (COM & LPT) and locate your device. It typically appears as Silicon Labs CP210x USB to UART Bridge (COM3) or similar.
Note the COM port number (e.g., COM3, COM11). You will use it in all subsequent flash and monitor commands.
2. Build and Flash the Firmware
All commands below must be run in the ESP-IDF PowerShell Environment.
2.1 Configure the Build
Enable CCache (optional, but significantly speeds up incremental builds):
set IDF_CCACHE_ENABLE=1
Navigate to the lighting-app example and source the ESP-IDF environment:
cd C:\esp-dev\connectedhomeip\examples\lighting-app\esp32
. C:\esp-dev\esp-idf\export.ps1
Install ESP-IDF tools and set the target chip:
python C:\esp-dev\esp-idf\tools\idf_tools.py install
idf.py set-target esp32
Note: Replace C:\esp-dev\esp-idf with your actual ESP-IDF installation path if different.
Launch menuconfig to set device-specific parameters (Device Type, Vendor ID, Product ID) as described in the Google Matter Codelab:
idf.py menuconfig
Build the firmware:
idf.py build
2.2 Resolve Python Dependency Warnings
When running idf.py commands, you may see warnings about unsatisfied Python requirements. This occurs because the system Python interpreter is being used instead of the ESP-IDF virtual environment. To resolve this, install the required dependencies:
python -m pip install -r C:\esp-dev\esp-idf\requirements.txt
Alternatively, ensure you are launching all commands from the ESP-IDF PowerShell Environment shortcut, which automatically activates the correct Python virtual environment.
2.3 Flash the Device
Replace COMx with your actual COM port (e.g., COM3 or COM11).
Erase the flash (recommended before first flash):
idf.py -p COMx erase-flash
Flash the application:
idf.py -p COMx flash
3. Monitor Serial Output
The ESP-IDF built-in monitor replaces tools like screen on Linux. Run:
idf.py -p COMx monitor
This connects to the serial port and streams output from the ESP32, including the QR code URL and manual pairing code needed to commission the device into your Matter hub.
Press Ctrl + ] to exit the monitor.
Alternatively, you can use PuTTY configured as a Serial connection with a speed of 115200 baud.
4. Commission the Device
Once the firmware is running and the monitor shows the QR code URL:
Open your Matter hub’s companion app (e.g., Google Home, Apple Home, or Amazon Alexa).
Select Add Device and scan the QR code displayed in the serial monitor output, or enter the manual pairing code.
Follow the on-screen prompts to complete commissioning.
Your ESP32 will now appear as a native Matter light device within your smart home ecosystem.
References
Google Matter Device Codelab — https://developers.home.google.com/codelabs/matter-device
ESP-IDF Windows Setup Guide — https://docs.espressif.com/projects/esp-idf/en/latest/esp32/get-started/windows-setup.html
ConnectedHomeIP (Matter SDK) on GitHub — https://github.com/project-chip/connectedhomeip